No one likes spam email. So today I'm going to show you how to stop it by configuring some simple spam settings within your Exchange server.
There are several spam settings within Exchange. There is an inbuilt filter that can be set and the ability to add external blacklist providers, such as spamhaus and spamcop. I will show you both methods.
In the following example, I will be using Exchange 2010 to configure the settings.
There are several spam settings within Exchange. There is an inbuilt filter that can be set and the ability to add external blacklist providers, such as spamhaus and spamcop. I will show you both methods.
In the following example, I will be using Exchange 2010 to configure the settings.
Exchange Content Filtering
Exchange Content Filtering is the in-built spam filtering for Microsoft Exchange. It i

- Double click to open Content Filtering

- In the new window that opens, select the Action tab
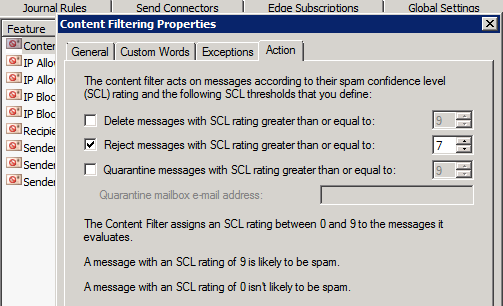
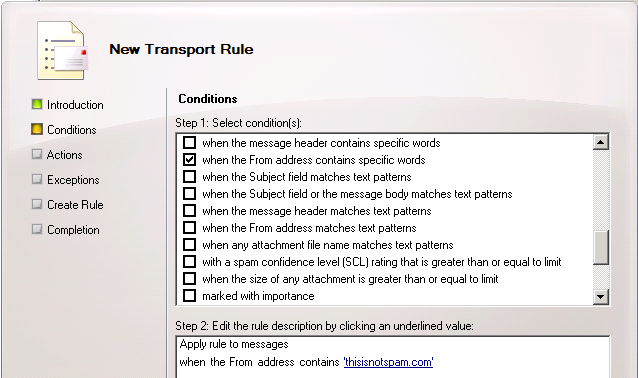
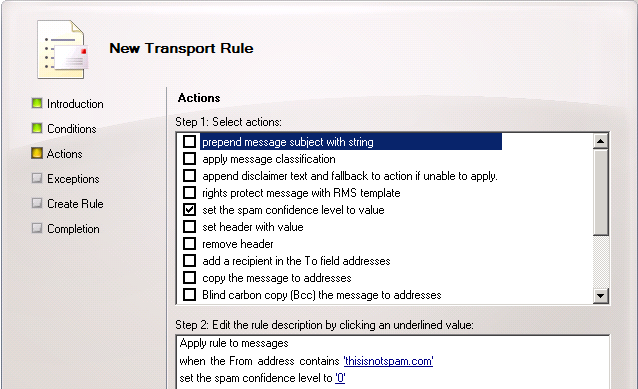
- Under the action tab, you have several options. Check the following boxes as required:
- Delete Messages, set with a high rating. This will delete all emails with an extreme likelihood to be spam before even hitting your Exchange server. This will not notify the sender that the email has been deleted.
- Reject Messages, set with a medium-high rating. This will notify the sender that their email has been classed as spam by the server and rejected.
- Quarantine Messages, set only if you will be checking this mailbox regularly with a medium-low setting. Send messaged with this rating to a dedicated mailbox. This way all messages sent to this mailbox can be checked for validity.
- Click OK to apply changes.
Configuring External Blacklist Providers
We like to configure black list providers alongside Microsoft's in-built spam filtering. We recommend this as the blacklist from the following recommended providers are updated constantly and will block most known spammers and open relay servers.
The following guide will help you to configure the server for these providers.
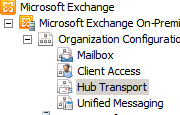
- Open Exchange Management Console (EMC)
- In Exchange Management Console (EMC), go to Organization Configuration > Hub Transport
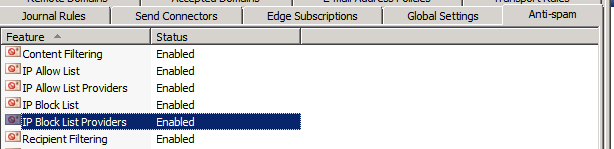
- Under Hub Transport, select the Anti Spam tab
- Double click on IP Block List Providers
- In the new window that opens, select the Providers tab
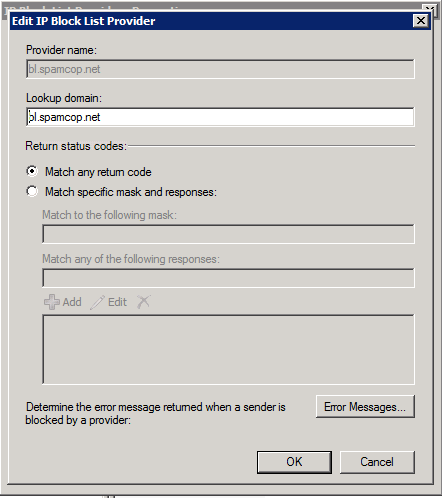
- In the providers tab, click add.. to input a new blacklist providers details, as per the example below
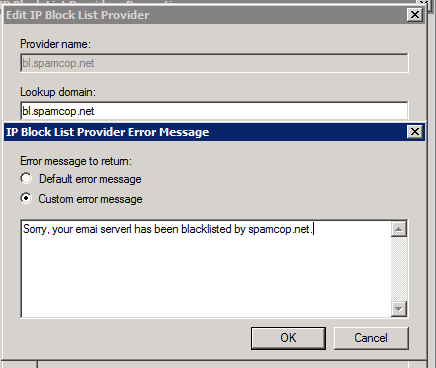
- You can then click the Error Messages... button to add a custom error message that will be returned if the email sender is found on this specific spam list. In this example, you could let the sender know that they have been blocked by Spamhaus.
- Click OK to add the blacklist provider
- We recommend adding the following blacklist providers to your server with a custom error message. This will allow you to help diagnose any problems if a customer complains that their email has returned an error and what service returned the error.
- zen.spamhaus.org
- dnsbl.sorbs.net
- bl.spamcop.net
- If one of your clients complains of being on one of the above spam lists, you can either remove the blacklist check from your server or recommend to the client they attempt to remove themselves from the blacklist provider. We recommend the client does what is required of them to remove themselves from the blacklist as otherwise they will have problems sending to others who may also use these blacklist providers in the future.
- By the end your block list should look like our example below
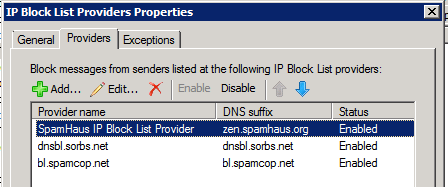
- Click Apply and OK to save the settings
- Email will now be checked against the blacklist providers to ensure the sending server is not on a known spam list
Was this post helpful to you? If so we would like to hear your thoughts. Please comment below or re-tweet below.

 RSS Feed